The two roles, verbatim
Every member of a managed group has User (default) at a minimum. On top of that they may additionally hold Group Administrator.| Role label | Scope | Authority |
|---|---|---|
| User (default) | One group. | View/Add/Update/Remove devices in this Endpoint Identity Group. |
| Group Administrator | One group. | View/Add/Update/Remove Self-Service users for this group. |
IP_Phones and a default user on
Digital_Signage; those are two separate Self-Service User
records.
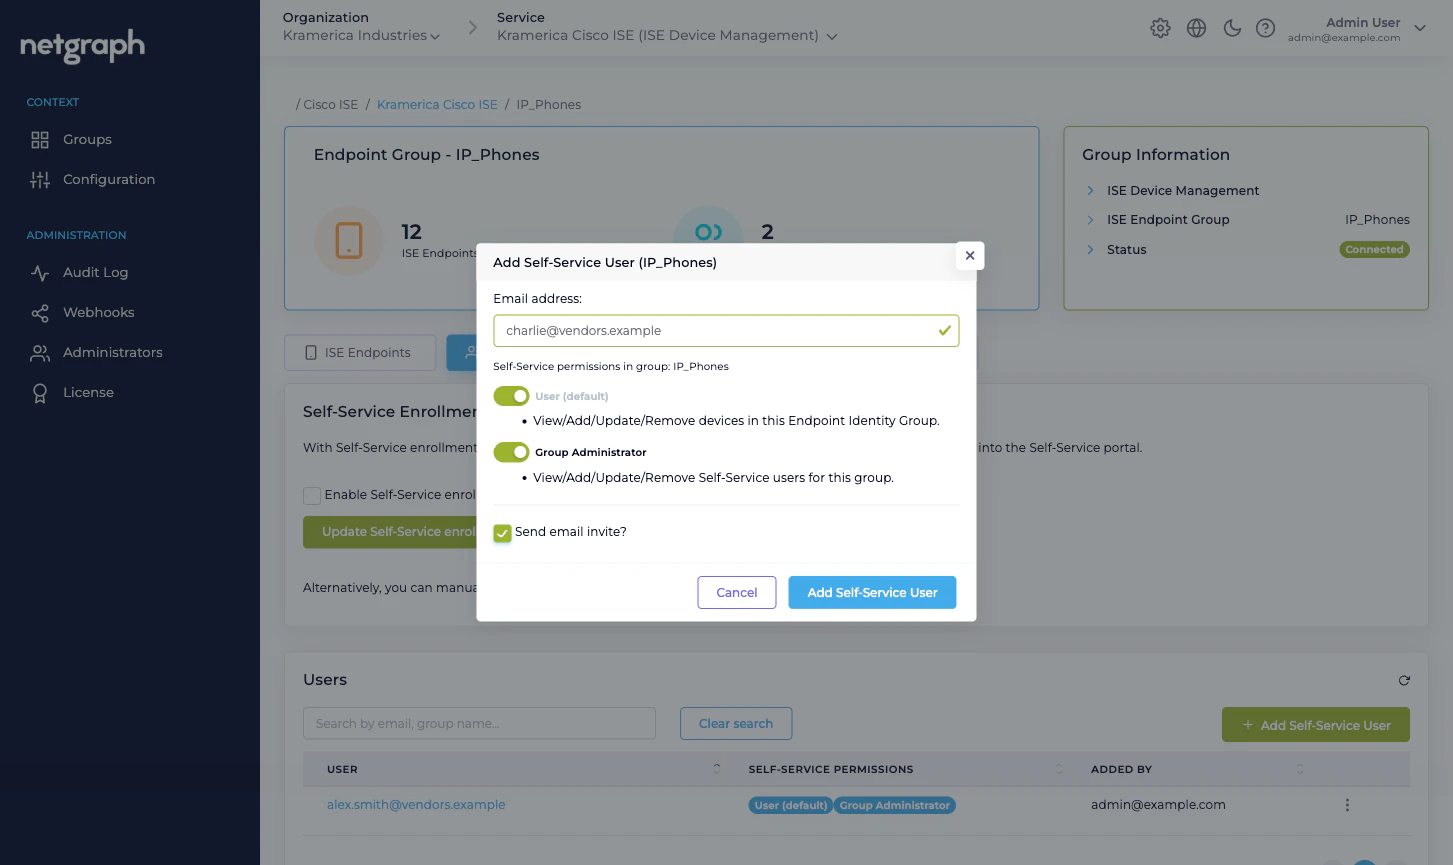
Inviting a Self-Service User
Open the group’s Self-Service Users tab.Enter the Email address
This becomes the invitee’s sign-in identity — either for the
email link they receive, or (if your Organization uses SAML
for Self-Service authentication) for the SAML assertion
matching.
Pick the permissions
User (default) is checked and disabled — it’s always on.
Tick Group Administrator as well if this person should
be able to manage other Self-Service Users on the group.
Choose whether to send an email invitation
Send email invite? is checked by default. Leave it on
for typical invites. Uncheck it if the user will sign in
via SAML — they don’t need the email.
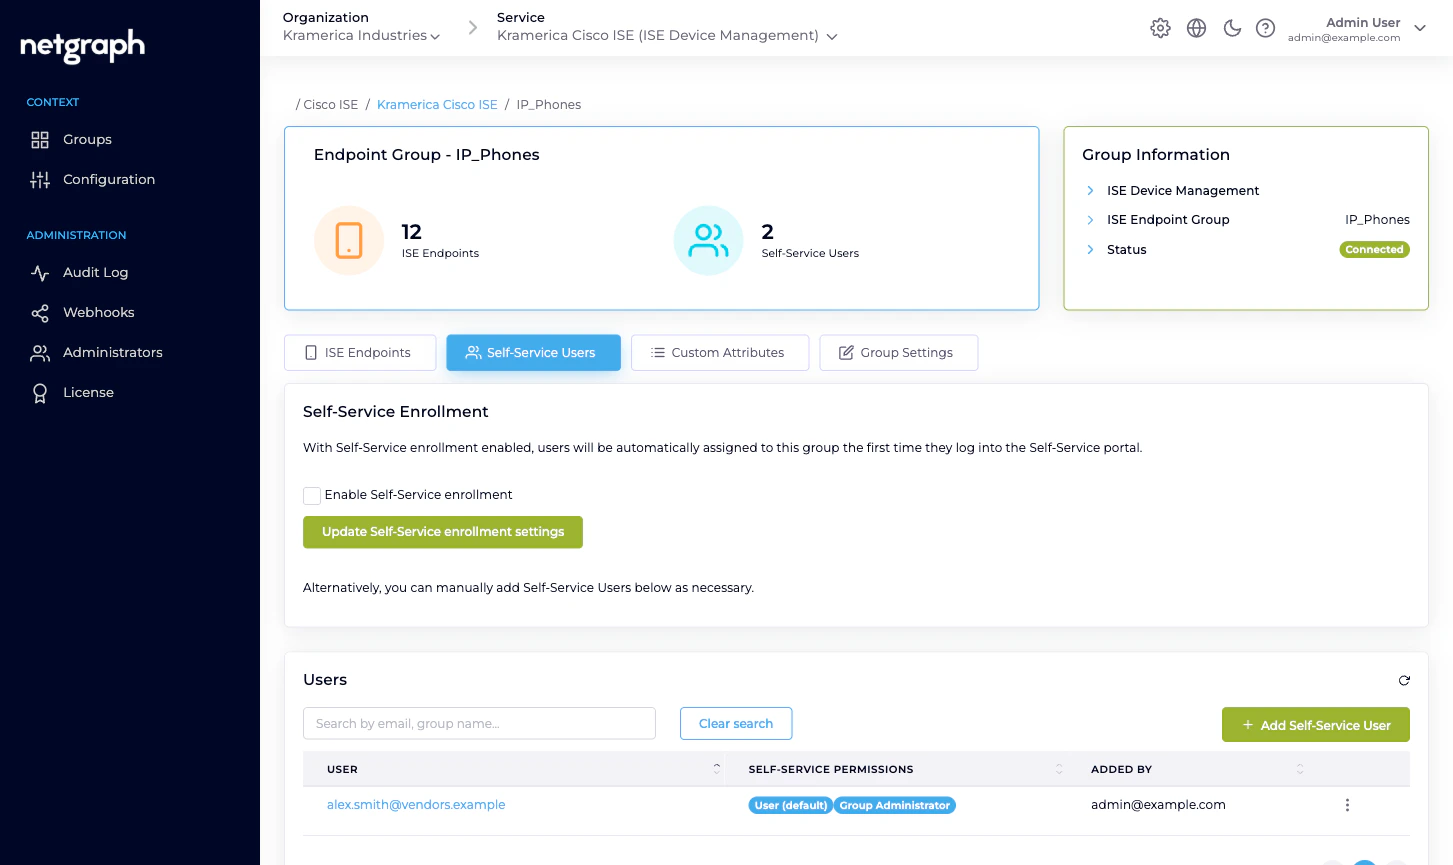
The Users table
The table on the Self-Service Users tab has four columns:- User — the email address they sign in with. Sortable. Click to open the user detail page.
- Self-Service Permissions — badges for the roles they hold (User (default) always; Group Administrator if promoted).
- Added by — either the Organization admin who added them manually, or a Self-Service Enrollment badge if they joined via SAML auto-enrollment on first login.
- Action — per-row menu:
- Resend Invitation — only relevant for manually-added users who haven’t yet signed in.
- Modify User — promote / demote, change scope.
- Remove <email> — revoke from this group.
Self-Service Enrollment — auto-provision via SAML
If your Organization has a SAML Identity Provider configured for Self-Service authentication (Organization SAML authentication), you can turn on Self-Service Enrollment per group. When enabled, any user who signs in to the Self-Service portal with a valid SAML assertion and matches the group’s enrollment rules is automatically added as a Self-Service User on that group on first login. Auto-enrolled users land with User (default) permission. They get a Self-Service Enrollment badge in the Added-by column so you can tell them apart from manually-invited users. Promote them to Group Administrator via Modify User if they need the role. Toggle Enable Self-Service enrollment on the Self-Service Users tab and save.Modifying a Self-Service User
From the row menu, pick Modify User. You can:- Promote a User (default) to also hold Group Administrator.
- Demote a Group Administrator back to User (default) only (you can’t remove the default role — that’s built in).
Removing a Self-Service User
From the row menu, pick Remove <email>. A confirmation dialog names the user and the group, and warns:You are about to remove the user <email> from the group <group>. This action will not impact any devices previously added by this user.Confirm to revoke the user. Their Self-Service session on this group is terminated at the next request; if they were a Group Administrator, the Group Users card disappears from their portal view immediately. Endpoints the user added are unaffected — Cisco ISE still holds them, the group still owns them, and the Added by field on each endpoint still records who added it. The endpoint- level history is preserved even after the person leaves.
Administrators vs Self-Service Users
Don’t confuse two roles that sound similar but live in different places:- Organization Administrators (under Administration → Administrators in the Context, and at the Organization level) are the people who operate the Admin Dashboard — configure the Context, approve Managed Attributes, define groups, review audits. See Organization Administrators.
- Self-Service Users (this page) are the delegated administrators who operate the Self-Service portal for one group.
Related
Self-Service portal
What the invitee sees once they click through.
Delegated administration
The role and trust-boundary model.
Organization SAML authentication
Single Sign-On for the Self-Service portal.
Audit Log
Every invite, promotion and revocation, recorded.