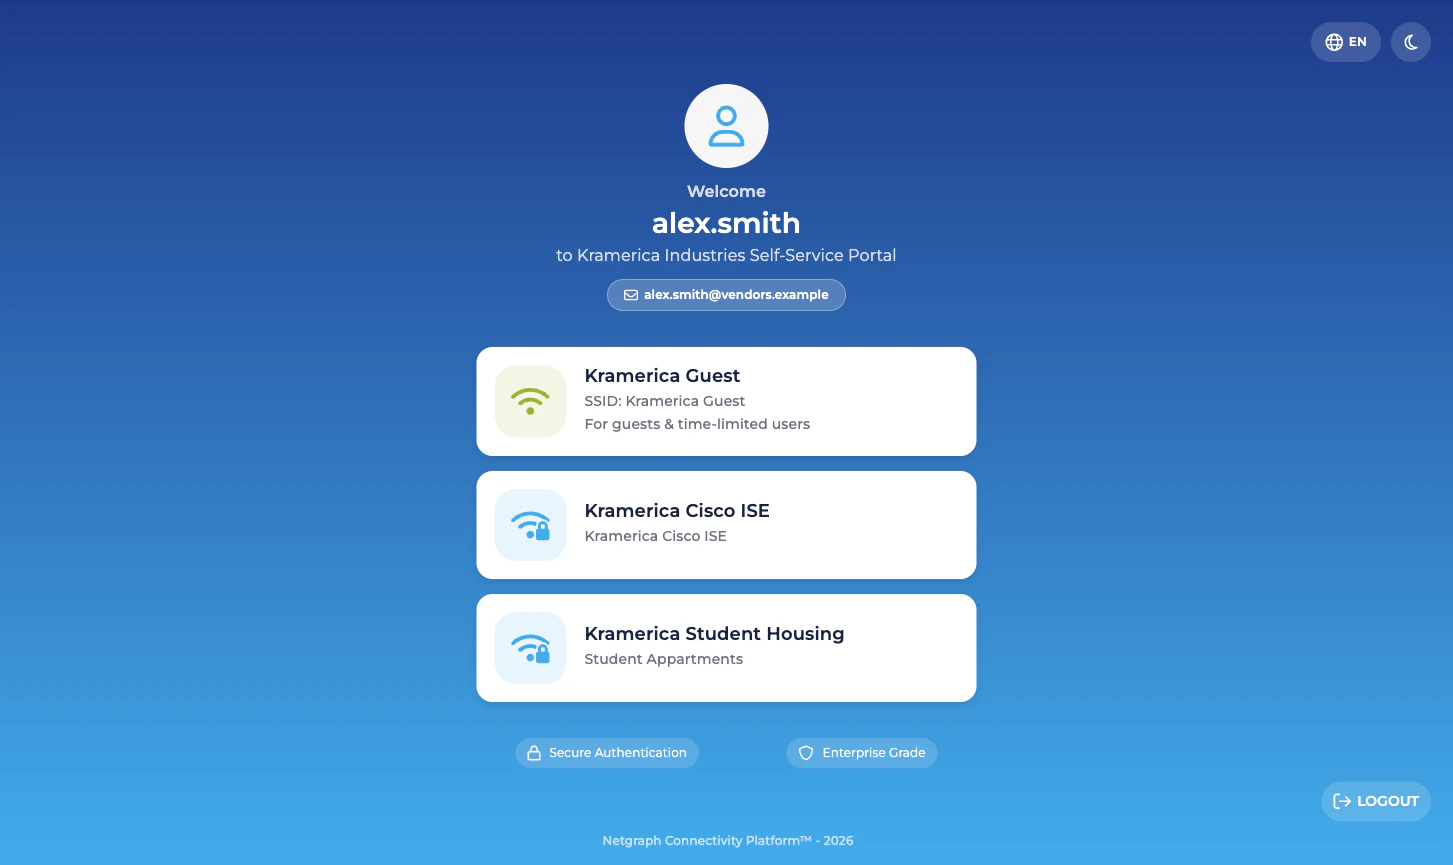
Landing — the groups you belong to
When a Self-Service User opens the portal they see a landing card for each Context in the Organization that they’re a Self-Service User of. A user who only exists on one Endpoint Identity Group sees a single card. A user who is, for example, a Group Administrator onIP_Phones and also a default user on
Digital_Signage sees cards for both.
Inside a group — the two or three cards
Each group’s detail view presents two cards for a User (default), three cards for a Group Administrator:- Devices. The group’s endpoint list. Every user sees this.
- Group Users. The list of Self-Service Users on the group. Only Group Administrators see this card.
- Batch Add Devices. A shortcut to the four-step CSV wizard.
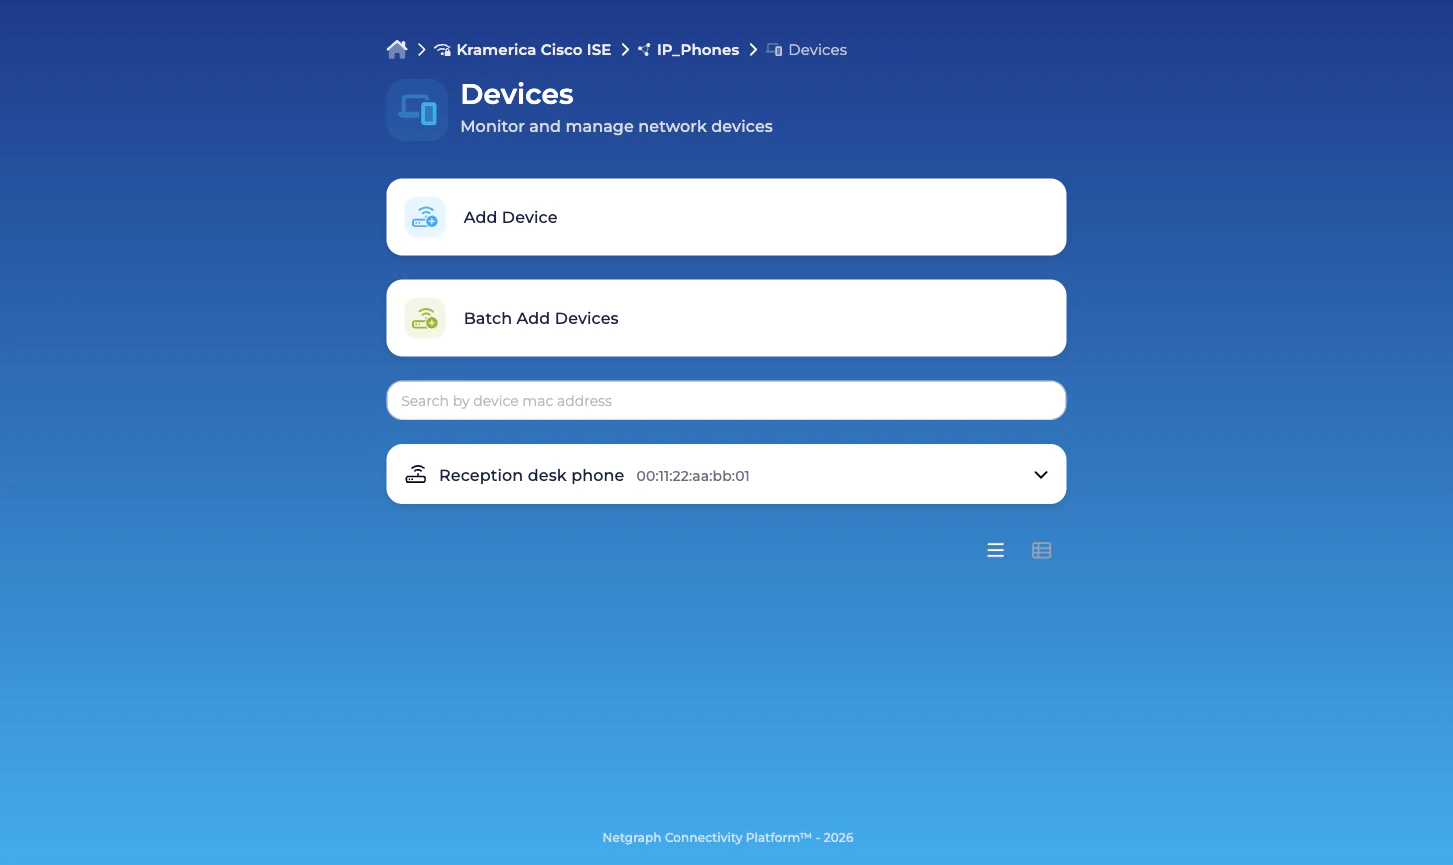
Devices — view, add, update, revoke
The Devices view opens on an accordion list of endpoints in the group. Each entry shows the MAC, the description, and — if the endpoint is currently authenticated on the network — the live session data Cisco ISE reports for it:- Description
- Added by / Added (when, by whom)
- Updated by / Updated
- MAC address
- Device type
- IPv4 address
- Network Device (NAS)
- Port / VLAN
- Session Duration
- Data Usage (DL/UL)
- Connection Information
- Modify — edit description, device type, Managed Attribute values specific to this endpoint. Changes are pushed into ISE.
- Revoke — remove the endpoint from the group. If the endpoint isn’t a member of any other group it’s deleted from ISE entirely.
- A search box that filters by MAC address.
- Online / Offline / All pills to show only endpoints with live sessions, endpoints without, or everything.
- Add Device to add a single endpoint.
- Batch Add Devices to open the CSV wizard.
Group Users — only for Group Administrators
Group Administrators see a Group Users card on the group’s landing. The view inside it is a list of every Self-Service User on the group — the member’s email, which of the two permissions they hold, and who invited them. From here the Group Administrator can:- Add User — invite a new Self-Service User by email. The invitee receives a portal login link.
- Modify — change permissions (for example, promote a default user to Group Administrator).
- Revoke — remove a Self-Service User. Removing a user does not affect the endpoints they added.
How a Self-Service User signs in
Two paths into the portal:- Email invitation link. The default when you add a Self-Service User from the admin side with Send email invite? checked. The link lands the user directly in their group.
- SAML Single Sign-On. If the Organization has a SAML Identity Provider configured for Self-Service authentication, Self-Service Users can sign in with their corporate identity, and new members can be provisioned automatically on first login when the group has Self-Service enrollment enabled. See Organization SAML authentication.
What a Self-Service User cannot do
A delegated administrator, even a Group Administrator, has no access to:- The Admin Dashboard. Different portal entirely.
- Cisco ISE itself. They never touch it.
- Groups they aren’t a member of — even other groups in the same Context, even the Organization’s other Services.
- Context-level configuration: API credentials, Managed Attribute definitions, Context name, group connect / disconnect.
Related
Managing Self-Service Users
The admin-side invite, promote, revoke flow.
Delegated administration
Where the role boundaries sit.
Batch adding endpoints
The four-step CSV wizard Group Administrators use.
Organization SAML authentication
Single Sign-On for the Self-Service portal.