Before you begin
You have administrator access to the Organization and the Admin Dashboard is open at the Services overview. You’ll also need:- A Cisco Meraki dashboard with an MR-series wireless network.
- A Meraki Dashboard API key with full organization access.
- An SSID configured for Identity PSK without RADIUS in the Meraki dashboard.
- The email address of the first resident you’ll appoint as Group Administrator.
1. Add the Meraki WPN Context
Open the Add Service Context picker
From the Organization’s Services overview, click Add Service Context.
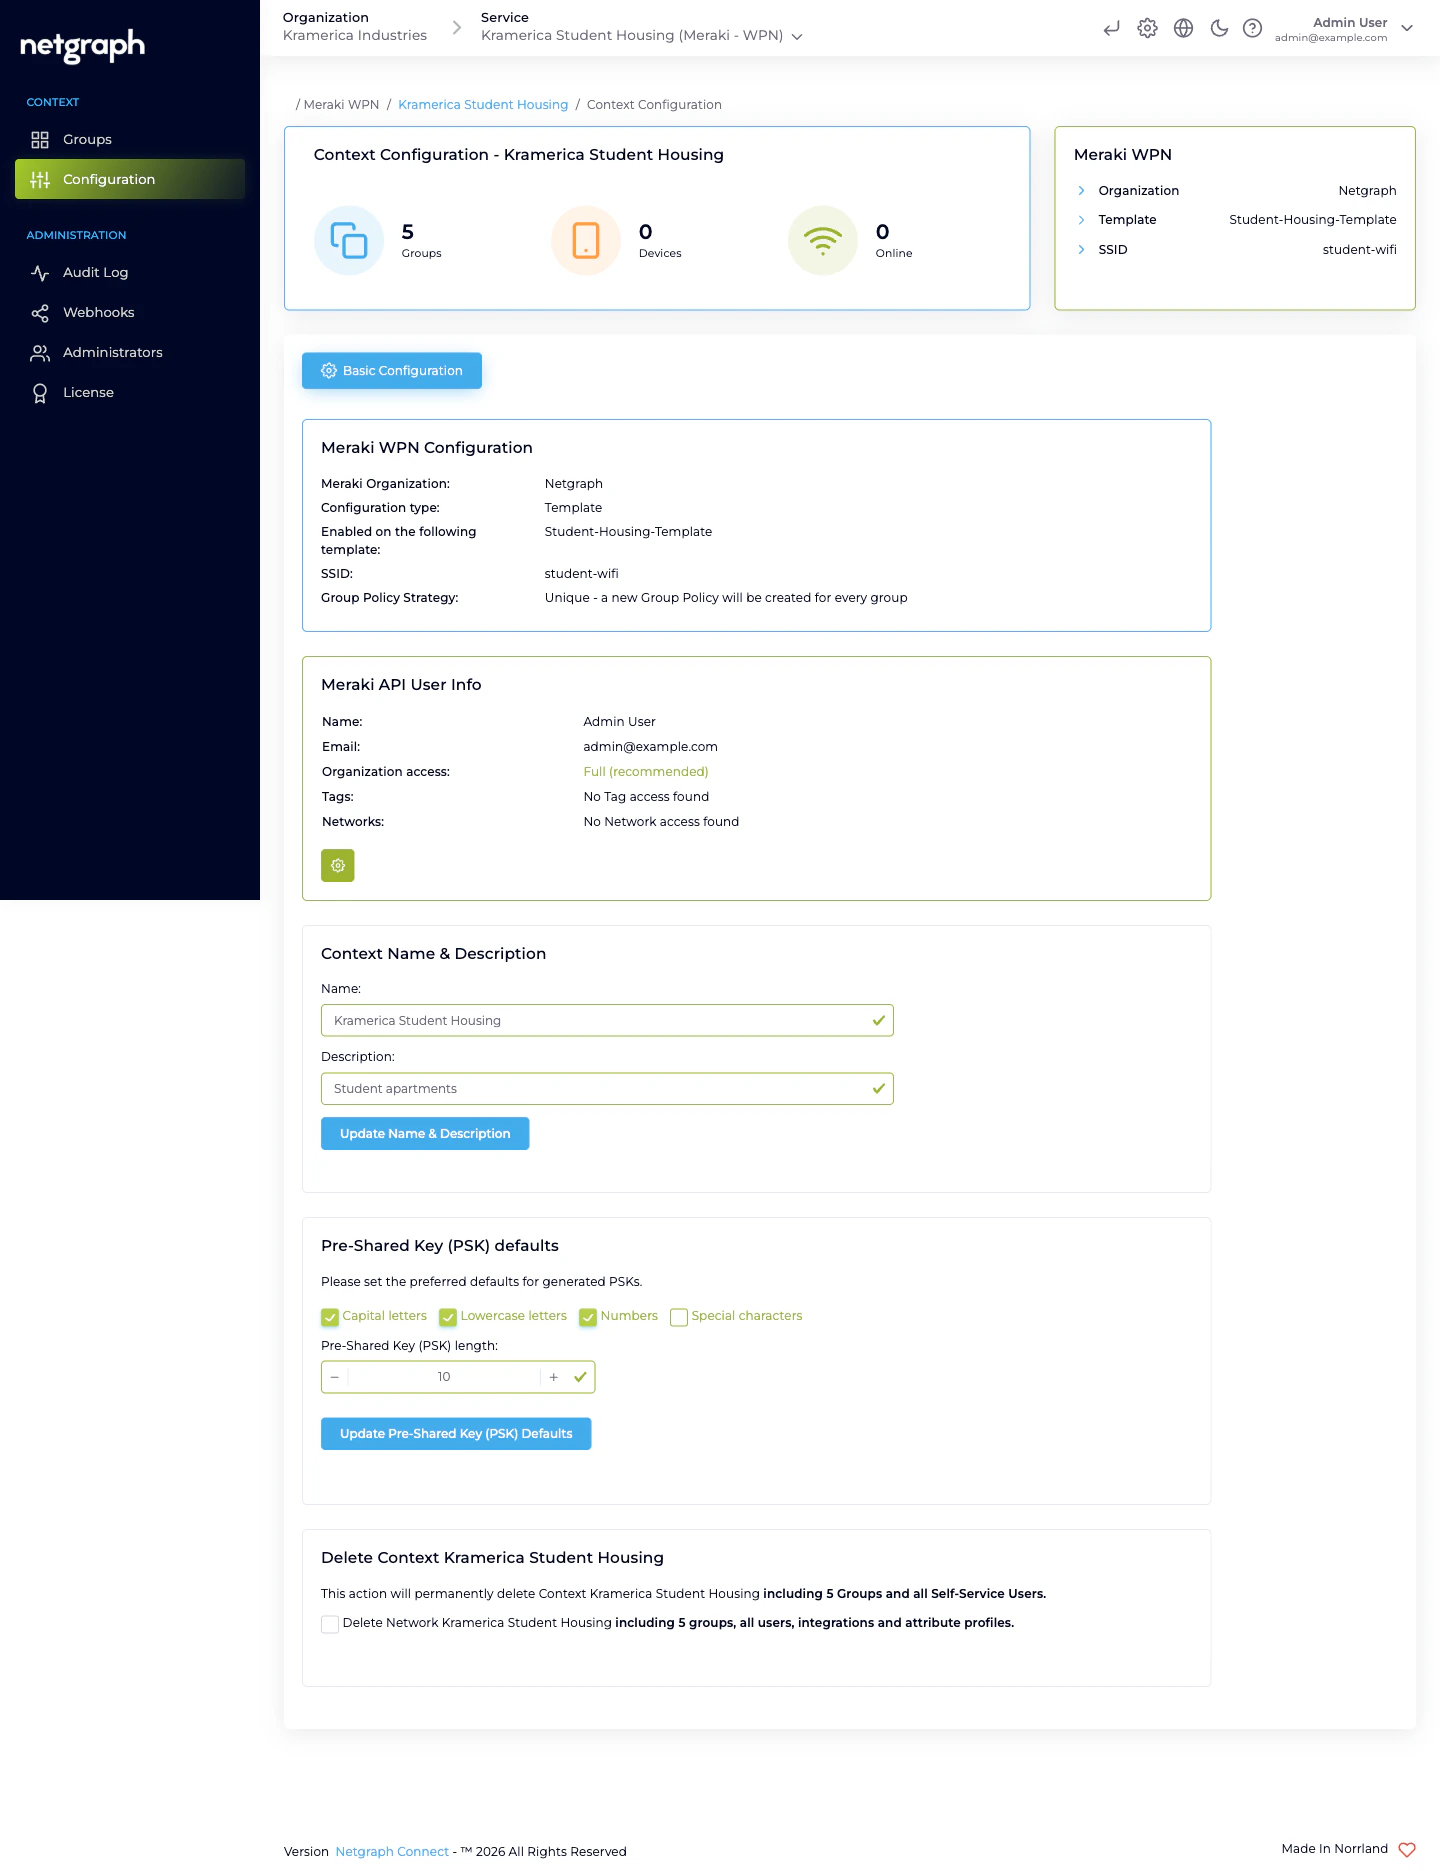
2. Connect to the Meraki dashboard
Open Configuration → Basic Configuration and fill the Meraki WPN fields:Paste the Meraki API Key
40 characters. The platform immediately queries the Meraki
Dashboard for the organizations the key can reach.
Choose a Configuration type
- Template based — the Meraki network inherits from a configuration template. Pick the template.
- Networks based (single network) — one specific Meraki network. Pick it.
- Networks based (multiple networks) — the same WPN SSID on several networks. Enter the SSID name, click Fetch matching networks, then check the networks to cover.
Pick the SSID
The dropdown shows SSIDs configured for Identity PSK without
RADIUS on the selected network or template. One Context governs
one SSID.
Choose a Meraki Group Policy Strategy
- One policy per group — every Wireless Personal Network gets its own Meraki Network Access Policy. Fine-grained per-unit behaviour at the cost of more policies in the Meraki dashboard.
- Shared Policy — every Wireless Personal Network references the same pre-existing Meraki Group Policy. Fewer policies, uniform treatment.
Set Pre-Shared Key defaults
Pick the character classes (capital / lowercase / numbers /
special) and the default length (8–63). These apply to
auto-generated PSKs going forward.
3. Onboard the first apartment
Click Create Wireless Personal Network
On the Context landing page. The form shows two tabs:
Create single and Create multiple.
Create single — for the first apartment
Enter the Name (for example, Apartment 301) and accept the
auto-generated Pre-Shared Key (or paste your own, 8–63 characters).
Click Create Wireless Personal Network.
The platform writes a Meraki Identity PSK on each associated
network and lands you on the new Wireless Personal Network’s
detail page.
4. Invite the Group Administrator
The resident receives a Self-Service portal login email. When they
click the link they see their apartment’s How to connect card
(SSID + PSK + QR code), a Change Passphrase card to rotate the
key, View Connected Devices to see everything joined to their
bubble, and Group Users to invite their roommates.
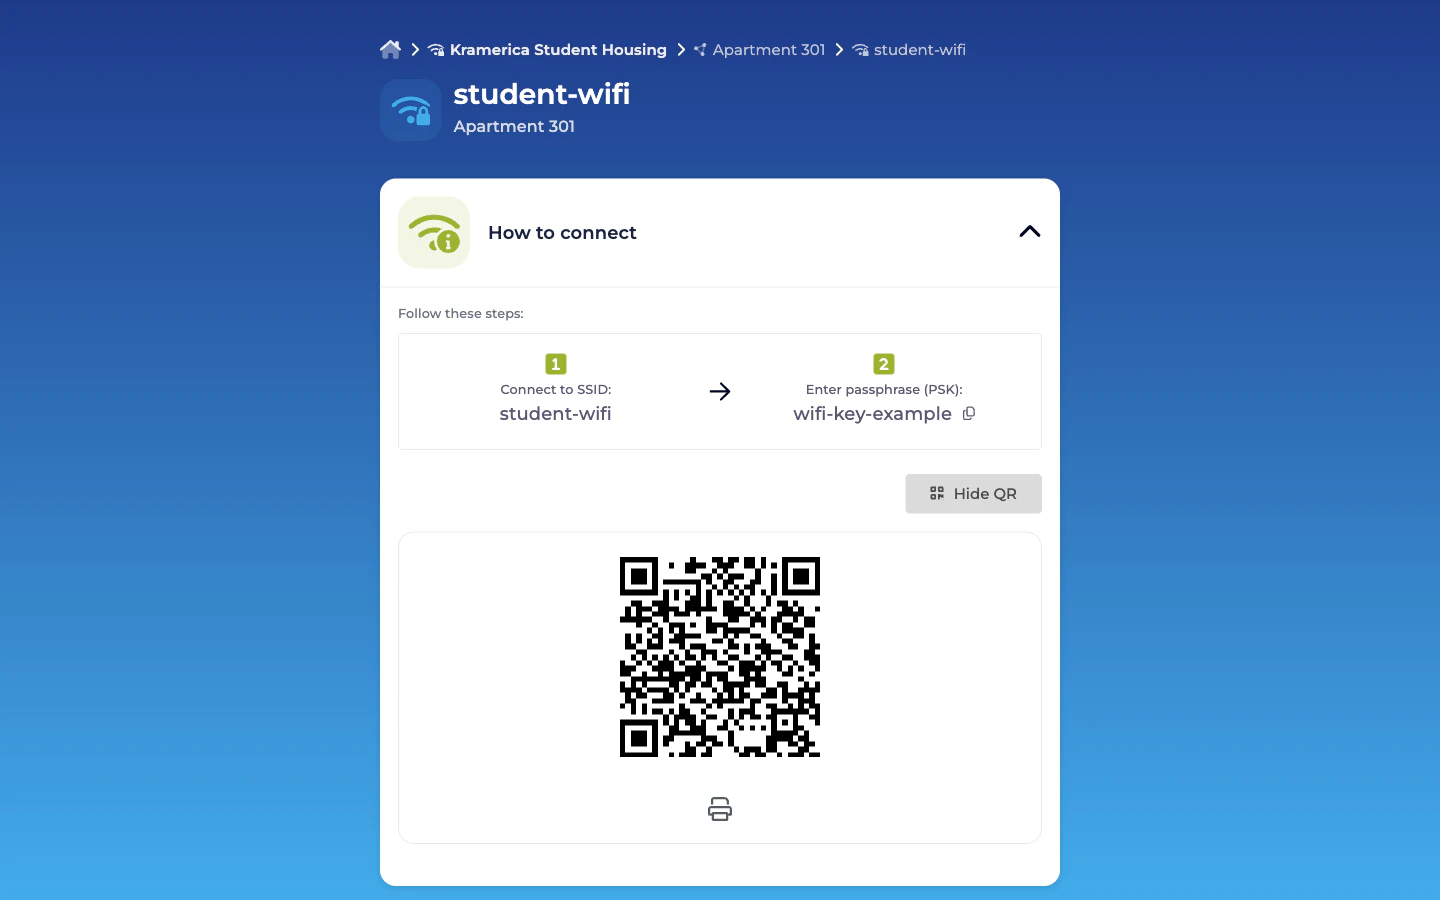
5. Connect a device
The resident scans the QR code (or types the PSK manually) on their phone. The phone joins the shared SSID with the apartment’s private key. Back on the admin side, under the Wireless Personal Network’s Connected Devices tab, their phone shows up within minutes.Next
Wireless Personal Networks
The per-unit bubble model in depth.
Managing Self-Service Users
Roles, invitations, revocation.
Meraki connection
All the Basic Configuration options in one place.
Self-Service portal
What residents see and can do.