Prerequisites on the Meraki side
- A Meraki dashboard organization you administer.
- A Meraki network with MR-series access points.
- A Meraki Dashboard API key with full organization access. Full access is recommended; restricted keys can miss objects the integration needs (group policies, clients, identity PSKs).
- An SSID configured for Identity PSK without RADIUS in the Meraki dashboard. The SSID can be freshly created or an existing one repurposed.
The fields, in order
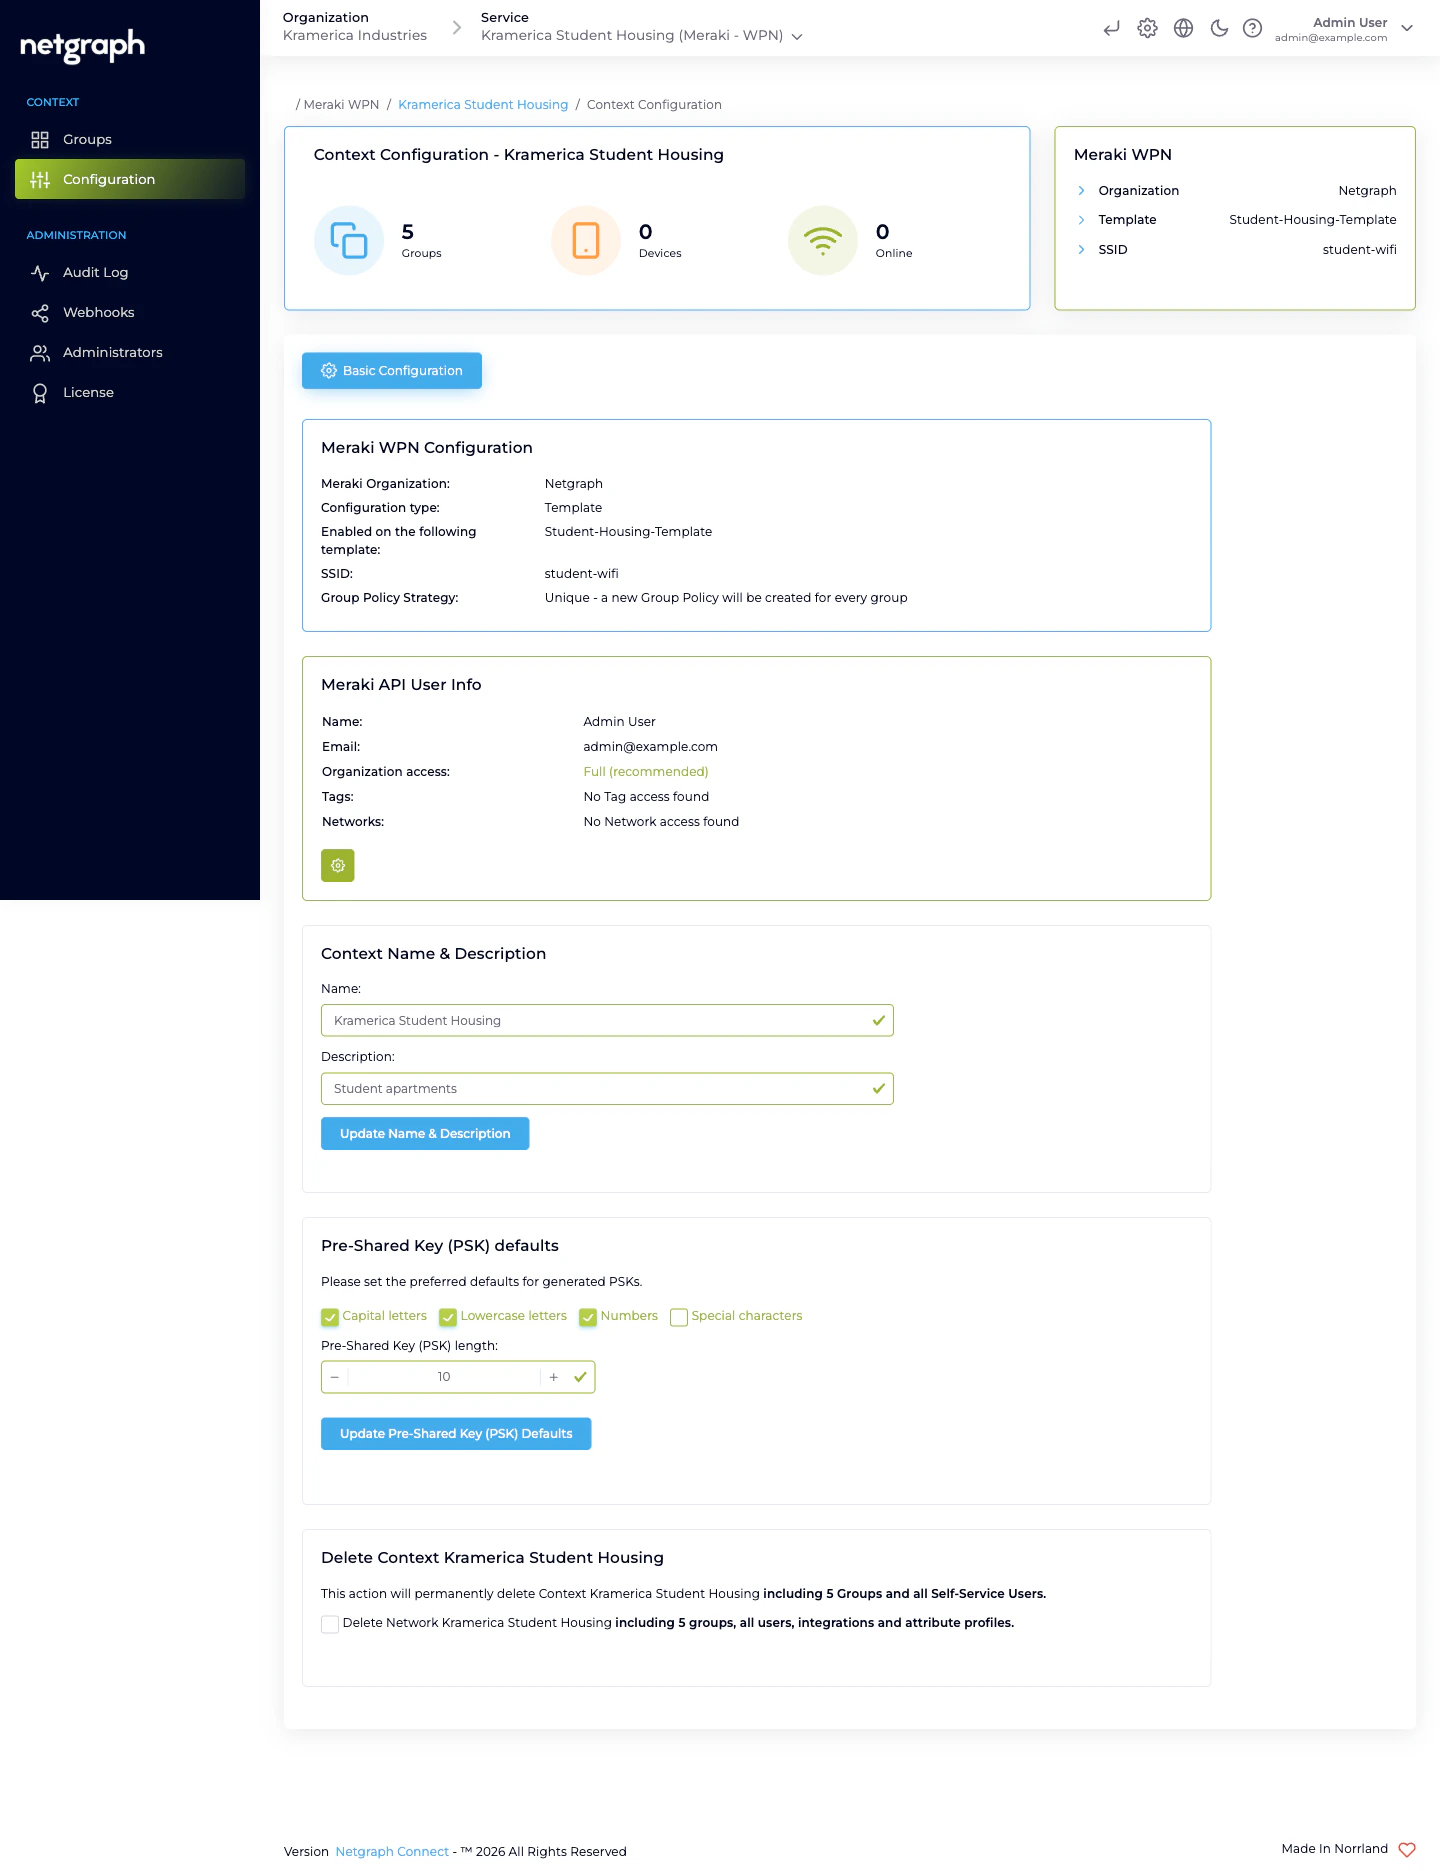
Meraki API Key
40 characters. Pasted once. When you save, the platform re-fetches the organizations and networks the key can reach. Rotating the key later is the same two-field flow: paste the new key, confirm the organization. The API key is marked secret in the audit log — it’s never readable after save, including by you.Meraki Organization
Populated from the Meraki Dashboard API after the key is validated. Pick the organization that owns the network you’re onboarding. After saving, a Meraki API User Info card appears below, showing the name + email of the account that minted the key, the organization-access level (Full / Read-only / Tag-restricted / Network-restricted), and — for a restricted key — the specific tags or networks it can see. Use it to sanity-check you didn’t paste the wrong key.Configuration type
Three options:- Template based — point the Context at a Meraki configuration template. The SSID lives in the template and is inherited by every bound Meraki network. Best for campuses with many Meraki networks that all broadcast the same SSID.
- Networks based (single network) — point the Context at exactly one Meraki network. Simplest option.
- Networks based (multiple networks) — point the Context at the same SSID name on several independent Meraki networks. You’ll enter the SSID name, click Fetch matching networks, and check the networks to include.
Network / Template
The dropdown (Template or Networks based single) is filtered to wireless-enabled destinations. In multi-network mode, you get a checkbox list after fetching.SSID
For Template and Networks based (single), a dropdown shows SSIDs that are enabled and configured for Identity PSK without RADIUS in the Meraki dashboard. For Networks based (multiple) you type the SSID name and the platform matches it across the selected networks.Meraki Group Policy Strategy
How the platform maps Wireless Personal Networks to Meraki Group Policies:- One policy per group — the platform creates a new Meraki Network Access Policy per Wireless Personal Network, owned and garbage-collected by the platform. Fine-grained per-unit network shaping (bandwidth cap per apartment, VLAN per apartment, layer-7 rules per apartment). Costs more Meraki group policies to manage on the Meraki side.
- Shared Policy — every Wireless Personal Network in the Context references the same pre-existing Meraki Group Policy. You pick which one from a dropdown. One policy defines the shaping for every apartment. Simpler to reason about at scale.
Shared Group Policy (conditional)
Only shown when the strategy is Shared Policy. Dropdown of the Meraki Group Policies defined on the selected network or template.Pre-Shared Key (PSK) defaults
A second card on the Basic Configuration tab, separate from the Meraki integration. Controls the auto-generator that runs every time a new Wireless Personal Network is created without an explicit PSK:- Character classes — checkboxes for Capital letters, Lowercase letters, Numbers, Special characters. At least one must be enabled.
- Pre-Shared Key (PSK) length — between 8 and 63, inclusive. Meraki enforces the same range.
Context Name & Description
Cosmetic — the name shows in breadcrumbs, the Services overview, and the Self-Service portal picker if a user has access to more than one Context. Description is optional and not shown to residents.Switching SSIDs
Pointing the Context at a different SSID is supported but disruptive:- The existing Wireless Personal Networks keep their passphrases on the platform side.
- The platform re-programs the Identity PSKs on the new SSID.
- Devices currently joined to the old SSID stop working. They have to forget the old SSID and join the new one with their apartment’s key.
Switching Group Policy Strategy
Supported, also disruptive:- One policy per group → Shared Policy — the per-WPN policies are deleted on the Meraki side; every WPN switches to the shared policy you select. Any per-unit shaping is lost.
- Shared Policy → One policy per group — the platform fans out one policy per WPN with the shared policy’s current values as the starting point. You can then customise each one directly on the Meraki side, but any change you make there can be overwritten the next time the platform reconciles.
Rotating the API key
- Generate a new API key in the Meraki dashboard.
- Paste it into Meraki API Key and save.
- Verify Meraki API User Info reflects the new account and access scope.
- Revoke the old key in the Meraki dashboard.
Related
Managing WPNs
Create, batch, rotate, remove.
Wireless Personal Networks
What each WPN owns.
Troubleshooting
When devices can’t connect or the API key breaks.