The ISE Endpoints tab
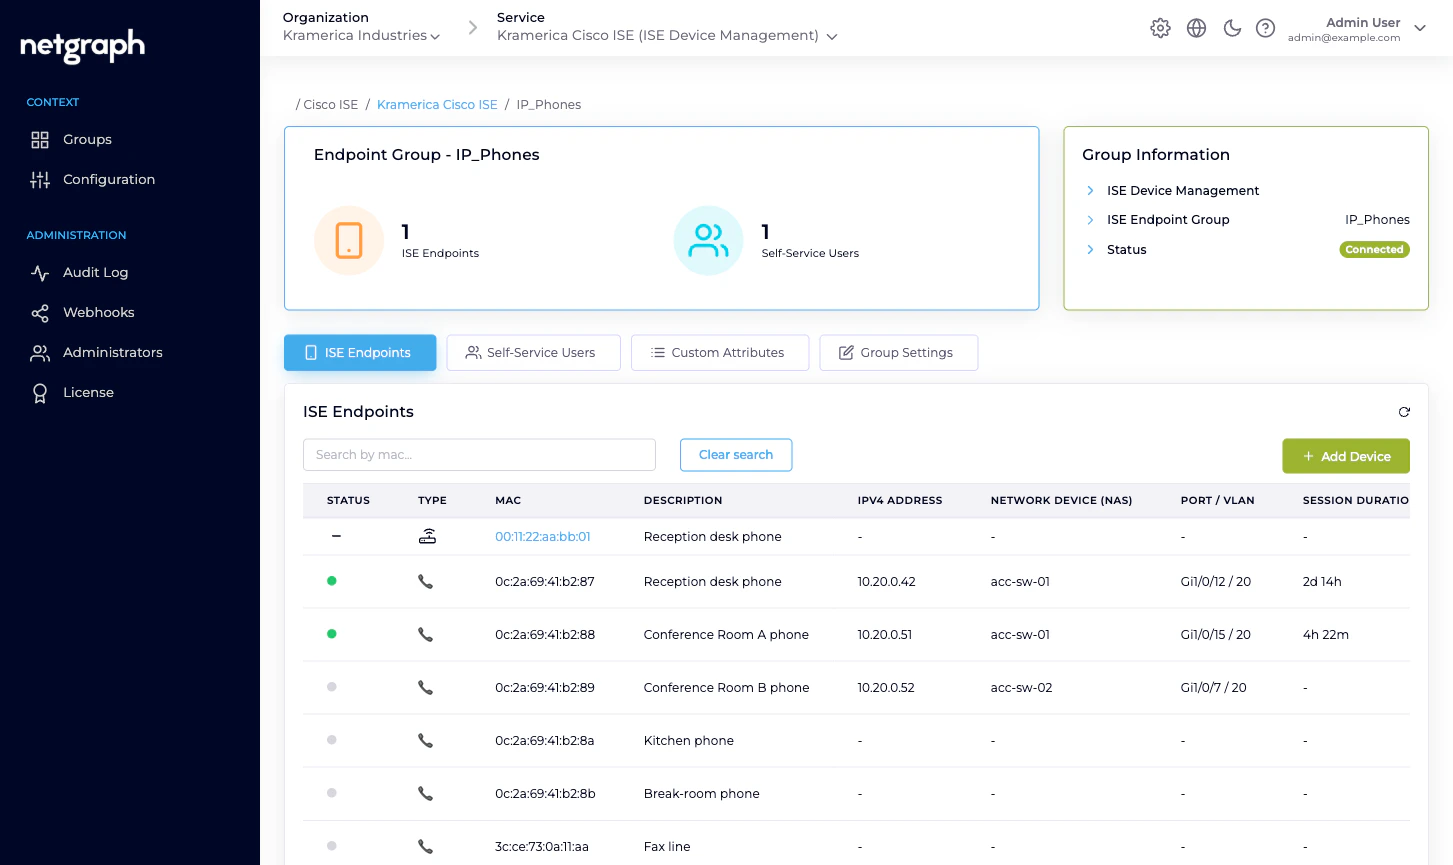
Open a managed group and click the ISE Endpoints tab (selected by default). The table shows every endpoint Cisco ISE reports as a member of the group. Columns:- Status — icon showing online (live session) or offline (no session right now).
- Type — icon for the endpoint’s device class (phone, camera, laptop, IoT, unknown).
- MAC — lowercase, colon-separated. Click to open the endpoint detail page.
- Description — the free-text description captured when the endpoint was added.
- IPv4 address — from the live session, if any.
- Network Device (NAS) — the switch / WLC / access point name, with IP.
- Port / VLAN — the NAS interface and VLAN assignment.
- Session Duration — how long the current session has been up.
- Data Usage (DL/UL) — download / upload totals for this session.
- Connection Information — the authentication method in use.
- Action — per-row menu: Edit, Move, Perform CoA (only when the endpoint is online), Delete endpoint.
- A Search by mac… filter.
- Add Device (primary) — single-endpoint add.
- Batch Add Endpoints (on the bottom-right) — four-step CSV wizard. Covered on its own page.
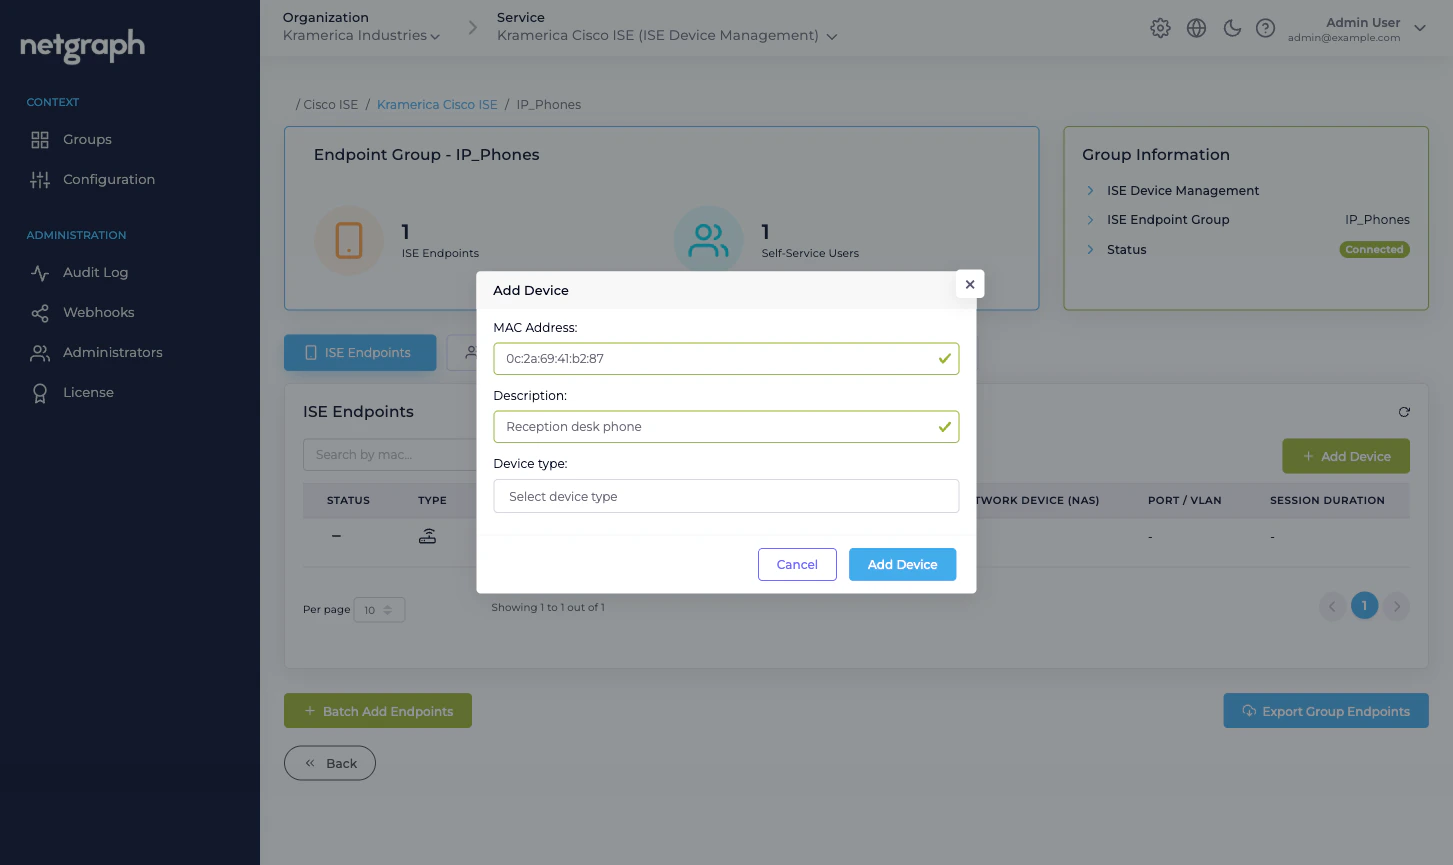
Adding a single endpoint
Fill the form
- MAC Address — 14 hexadecimal characters, any common format (colons, dashes, none). Case-insensitive; stored lowercase.
- Description — a short free-text description. Shows up in the list and in ISE.
- Device type — optional; picked from the dropdown of device types the Context recognises.
Already in another group? Adding a MAC that Cisco ISE
already holds in a different group moves the endpoint into
the group you’re adding to — it doesn’t create a duplicate.
If that’s not what you wanted, use Move instead (see
below).
Editing an endpoint
From any endpoint’s row menu, pick Edit. You can change:- Description.
- Device type (if the Context defines device types).
- Any Managed Attribute value the group is configured for.
Moving an endpoint to another group
Choose a destination group
The dropdown lists every connected Endpoint Identity Group
in the Context.
Deleting an endpoint
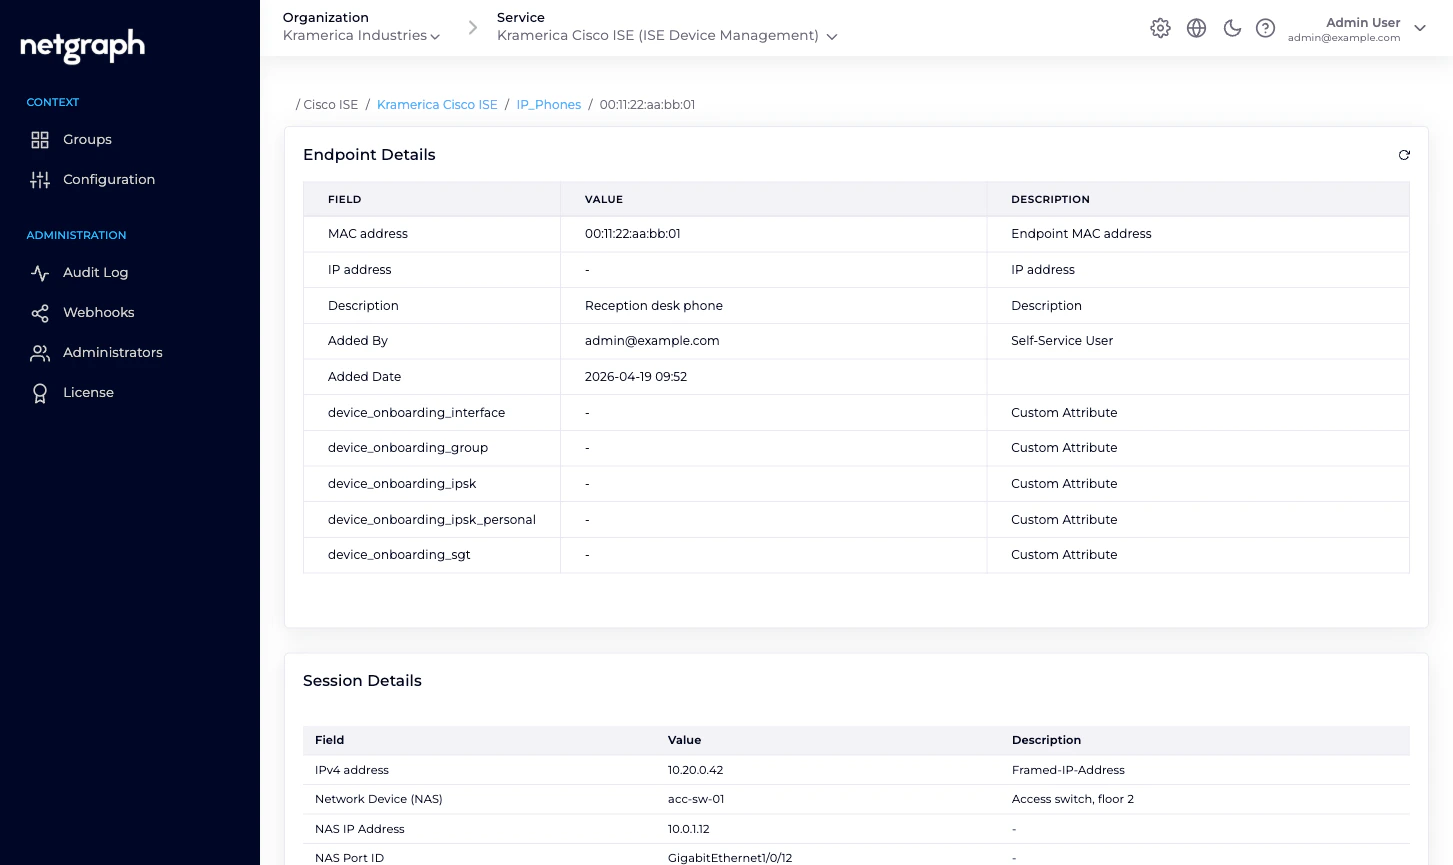
From the row menu, Delete endpoint removes the endpoint from Cisco ISE. Audited. No undo — re-add if you made a mistake.The endpoint detail page
Clicking a MAC opens the endpoint detail page, which is richer than the row can show:- Endpoint Details — MAC, IP, Description, Added by / Added Date, Last Updated by / Last Updated, plus every Managed Attribute value the endpoint carries.
- Session Details — IPv4, Network Device, NAS IP Address, NAS Port ID, VLAN, Session Duration, Data Usage, Packets Received / Sent, Authentication Method, Authentication Protocol, Authentication Status, Authorization Profiles, plus around twenty more attributes Cisco ISE reports for the session. If the endpoint isn’t currently authenticated, this card says No Session Data available.
- RADIUS Attributes — the raw attributes from the most recent RADIUS Access-Accept. Useful for troubleshooting policy hits.
- Additional Authentication Details — ISE’s per-auth extras.
What the Self-Service side does differently
Group Administrators and default users see a slimmer version of this page. The differences:- Accordion, not table. Each endpoint expands to show the same information per row, optimised for smaller screens.
- Modify and Revoke only. No Move (single-group scope), no Delete (same thing as Revoke in admin terms), no Perform CoA.
- Filter pills — Online / Offline / All — instead of a boolean search filter.
Related
Batch adding endpoints
The four-step CSV wizard.
Change of Authorization
Re-authenticate an endpoint after a group move or attribute change.
Managed Attributes
Per-group and per-endpoint attribute values synced into ISE.
Self-Service portal
What delegated administrators see for the same endpoints.